


Quik Drive®
Quik Drive is the fastest, most reliable and ergonomic way to install high volumes of screws. It's that simple.
Related Content
What is Quik Drive?
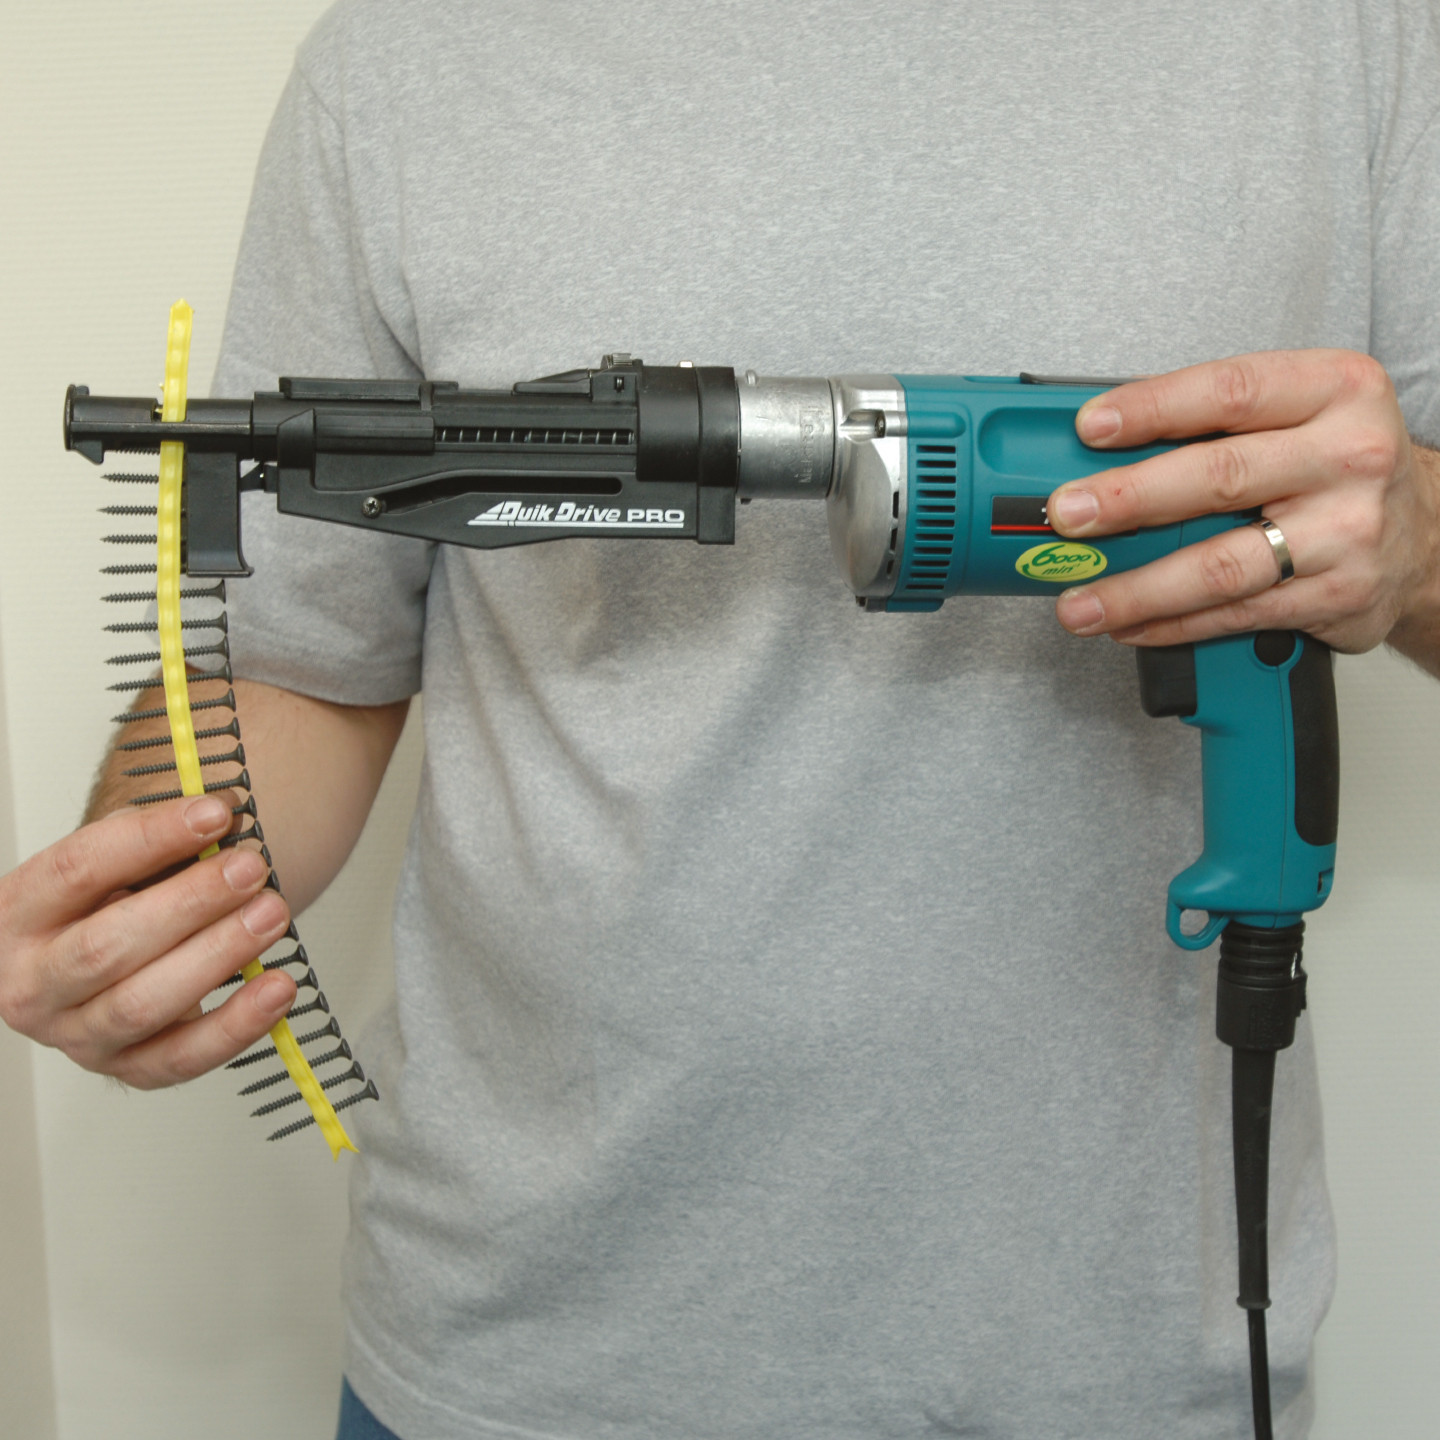
A collated screw system like no other, Quik Drive couples up with all major screw guns, allowing them to receive collated strips of screws that can be driven into floor, wall and ceiling materials in a fraction of a second.
A fastening solution for every situation
Alongside the equipment, goes a huge range of screw types, each designed specifically to fasten materials such as:- OSB
- Plywood
- Drywall
- Decking (softwood, hardwood and composite)
- Steel
- Fibre Cement Board
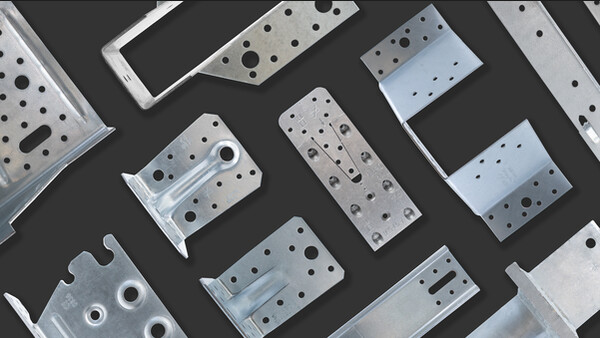
- Construction Connectors
All of which can be fastened down to substrates including timber or steel.
Links
Components
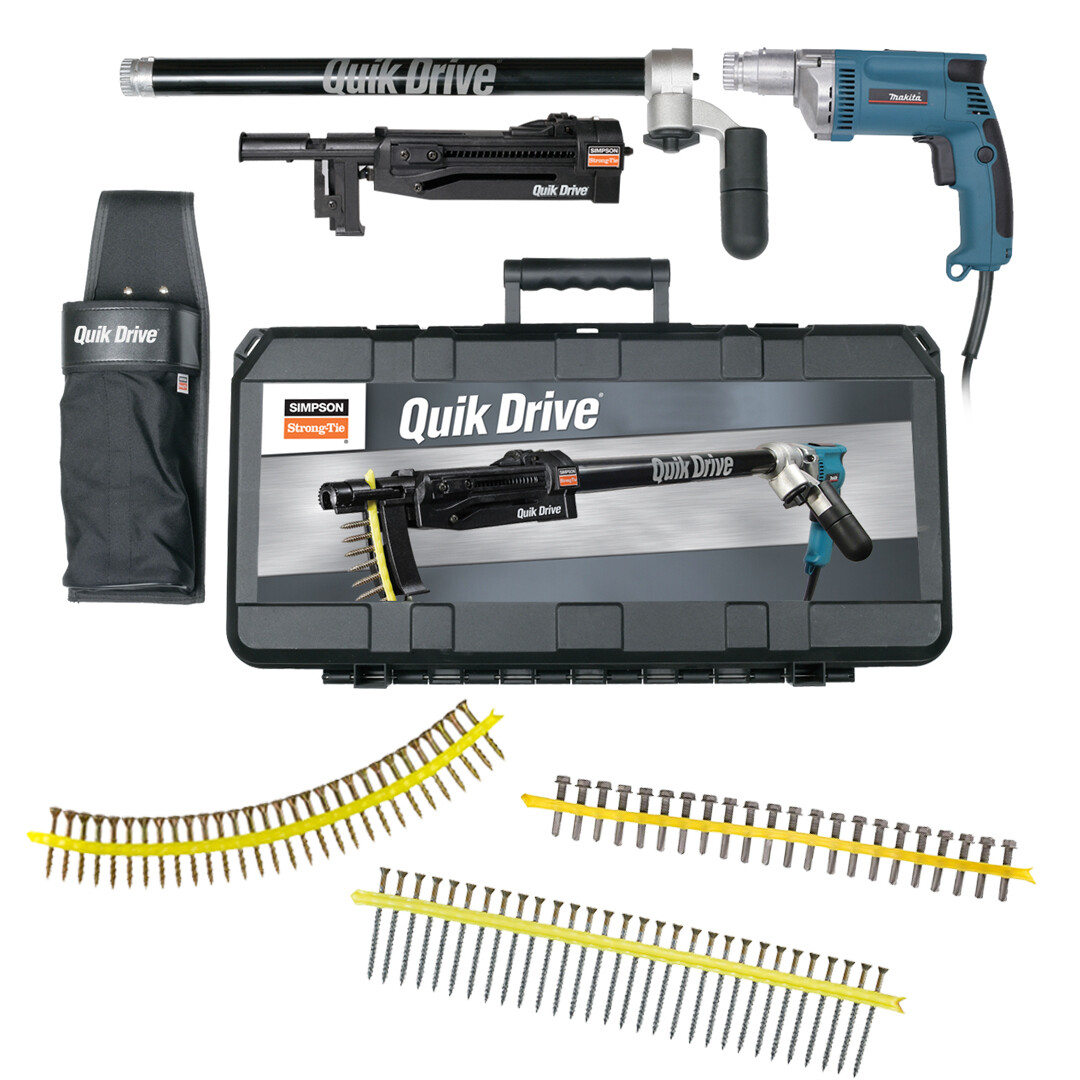
The Quik Drive system comprises:
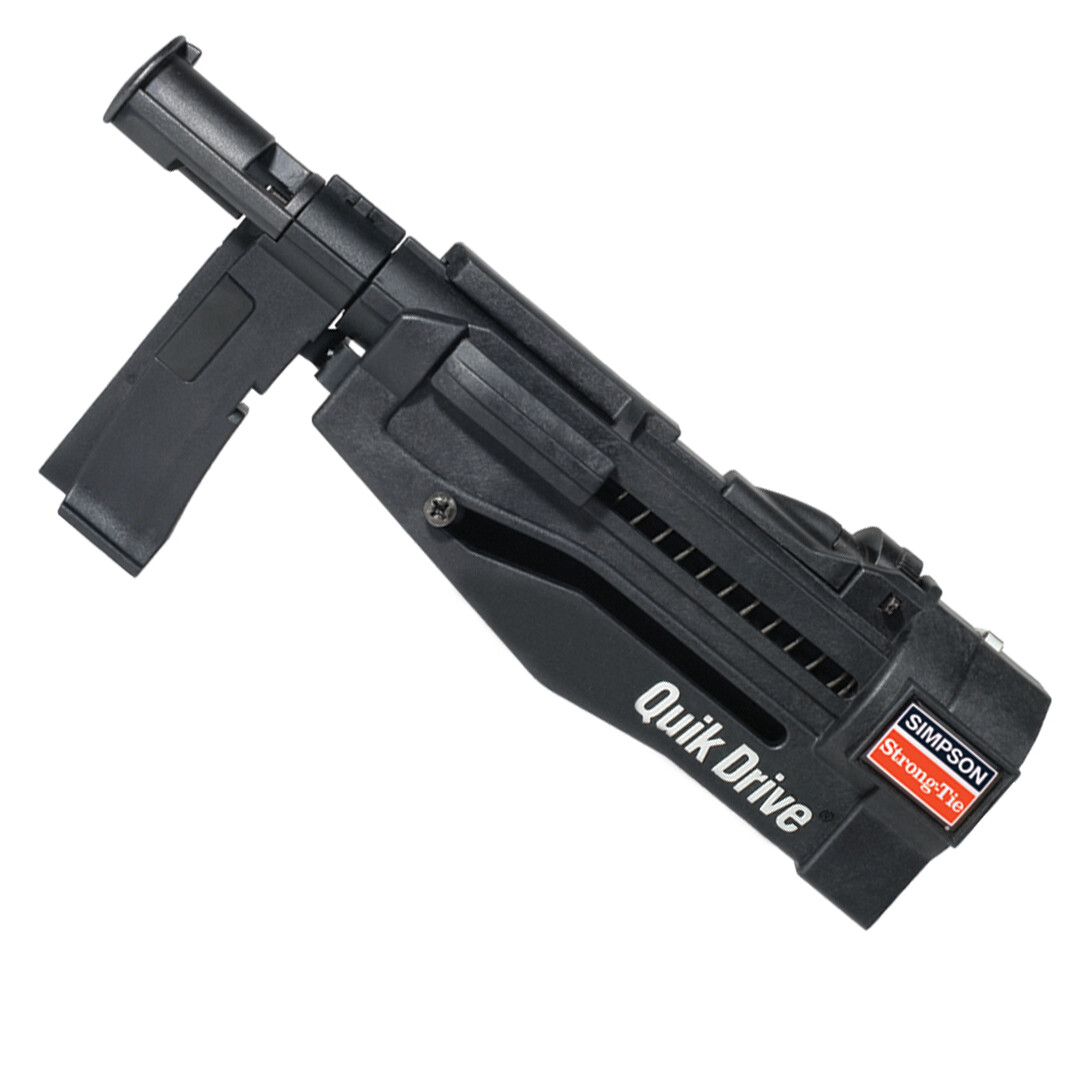
- Quik Drive tool
- Specialised nose pieces
- Screwgun adapter/couplings
- Screw pick holder/quiver
- Driver bits (also included with screws)
- Extension to operate on floors and ceilings without crouching or stretching
- Carry case

System components (click to expand)
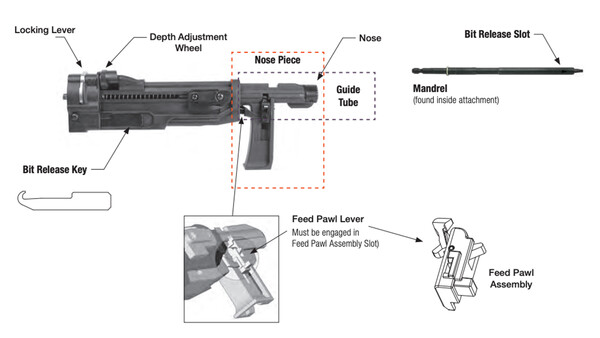
Quik Drive system features (click to expand)
MTHZ - for fastening underlayment to timber or steel
The MTH underlayment screw is designed for fast and secure underlayment to subfloor installations. Unlike nails, the MTH underlayment screw has an intricate high-low thread pattern designed to prevent squeaking by holding plywood tight to the subfloor and thus preventing withdrawal.
Related materials
Information for Quik Drive® owners
Quik Drive Installation
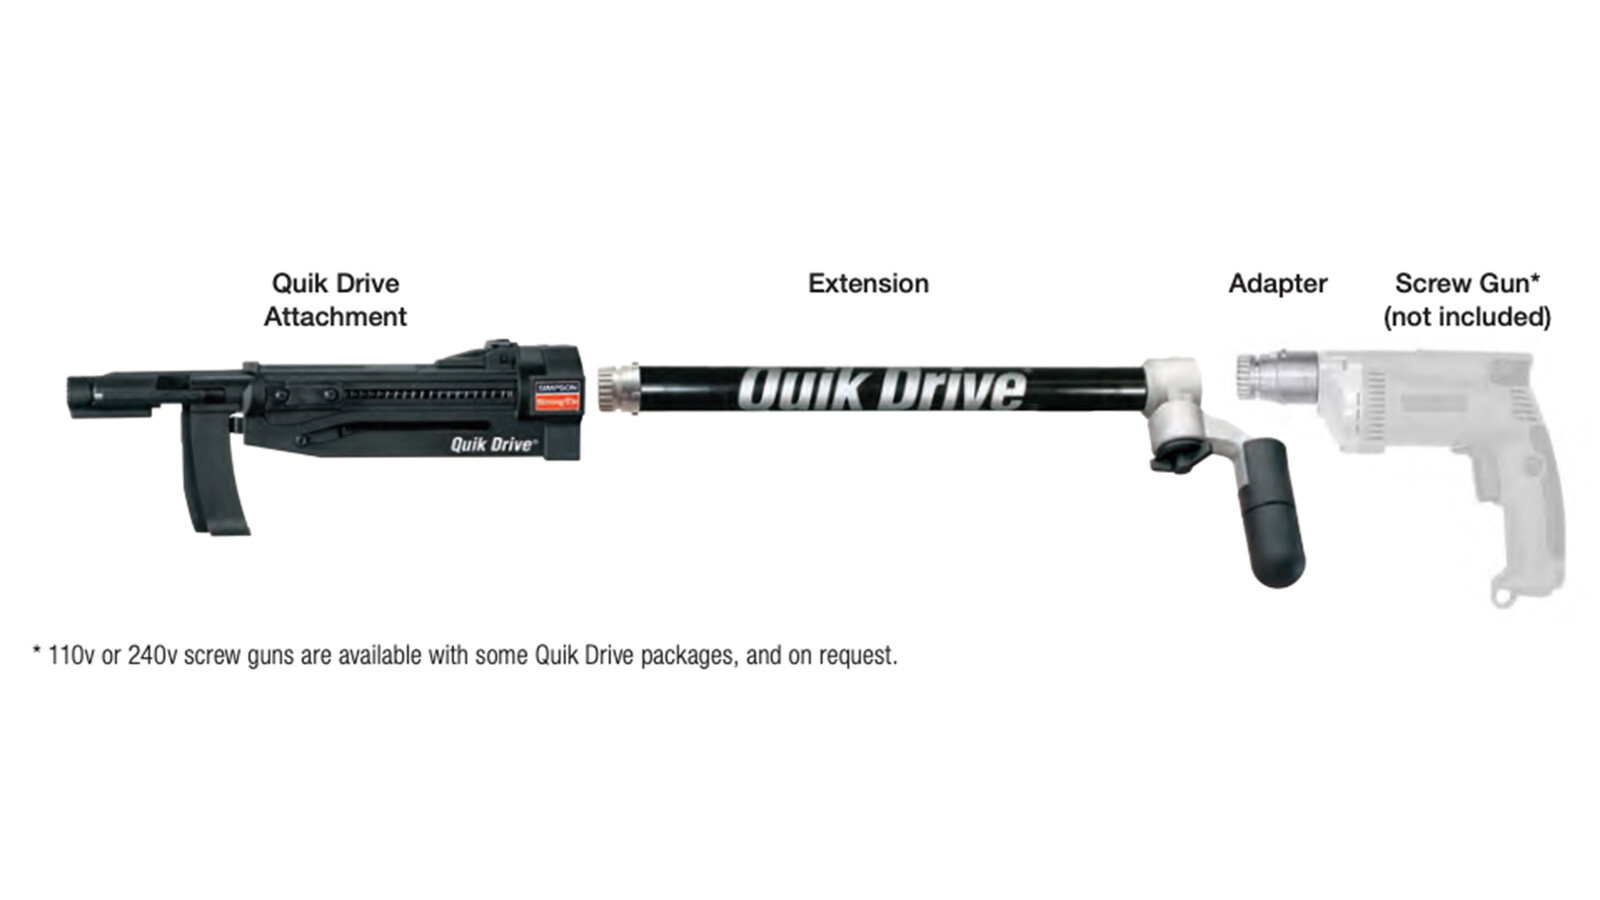
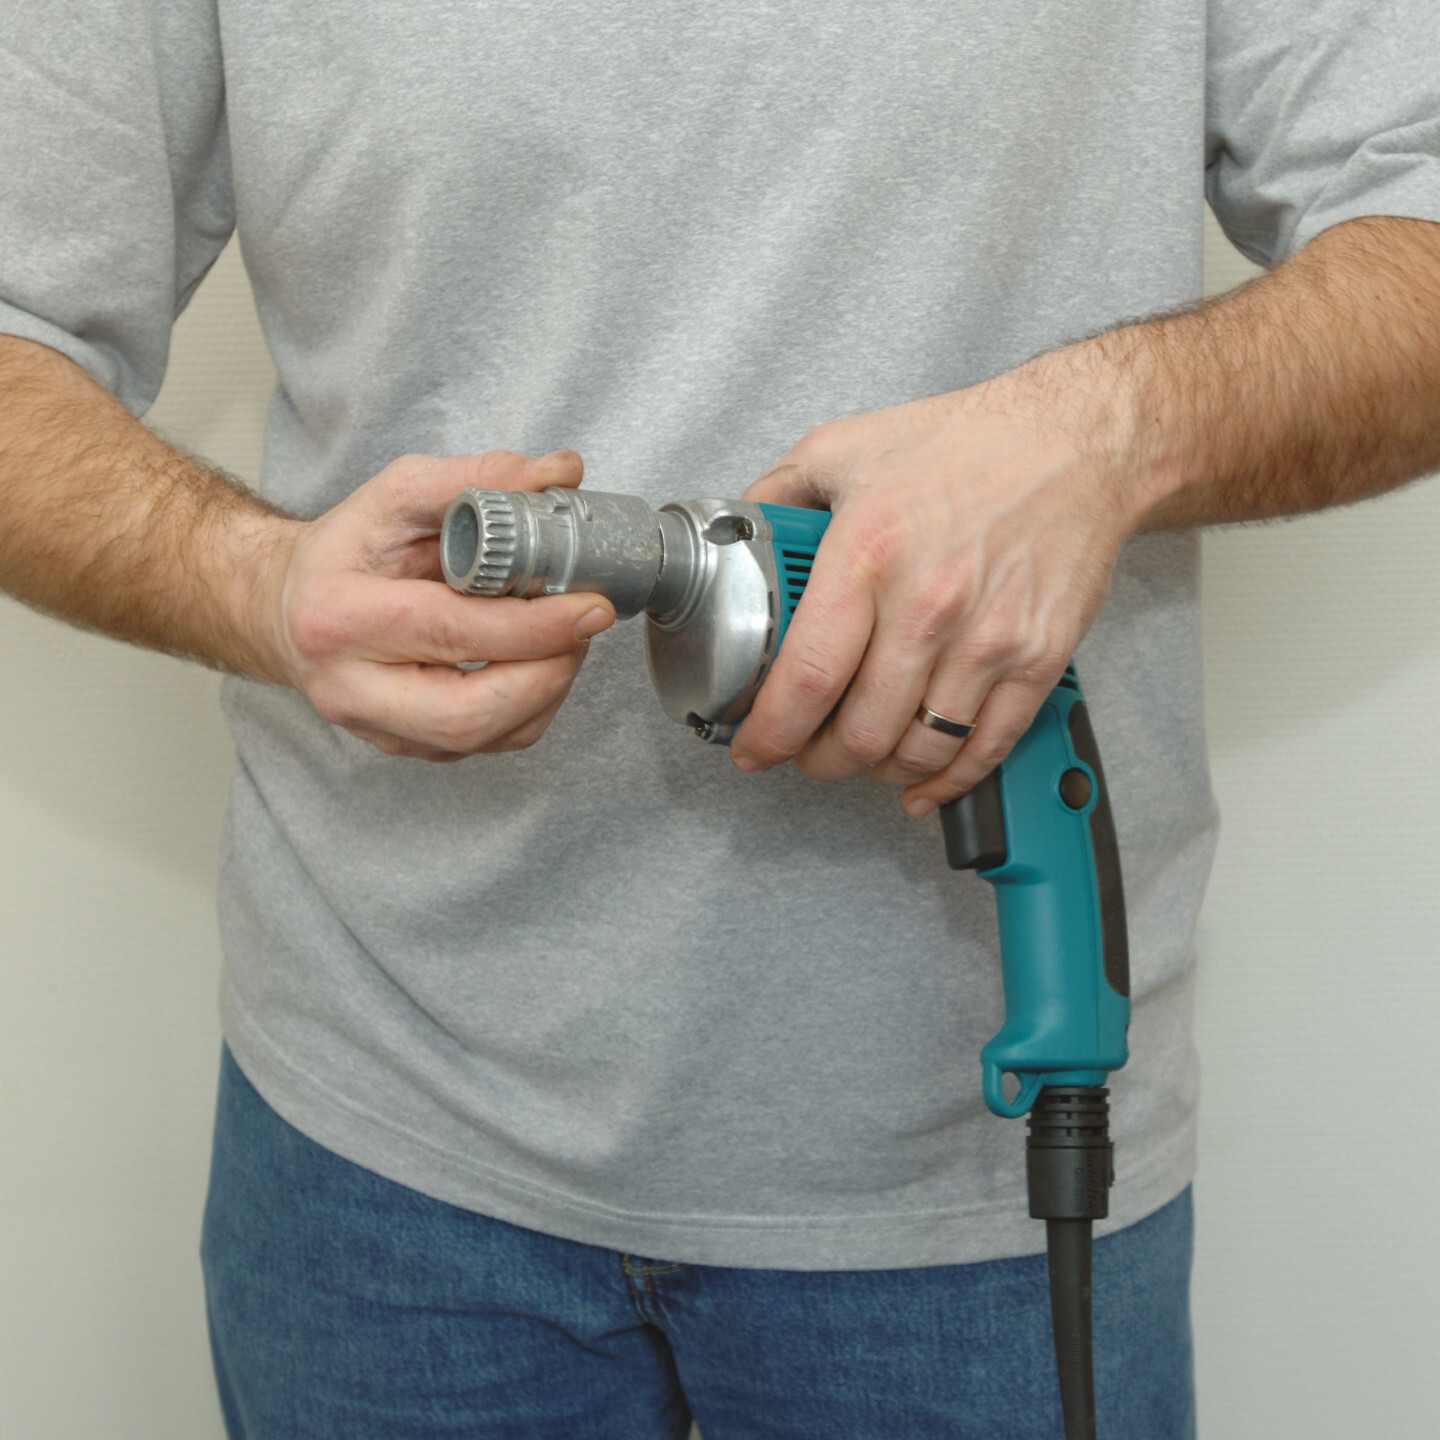
Quik Drive adapters make it easy and can in a matter of seconds convert the majority of all screwdrivers to our automatic screw system Quik Drive.
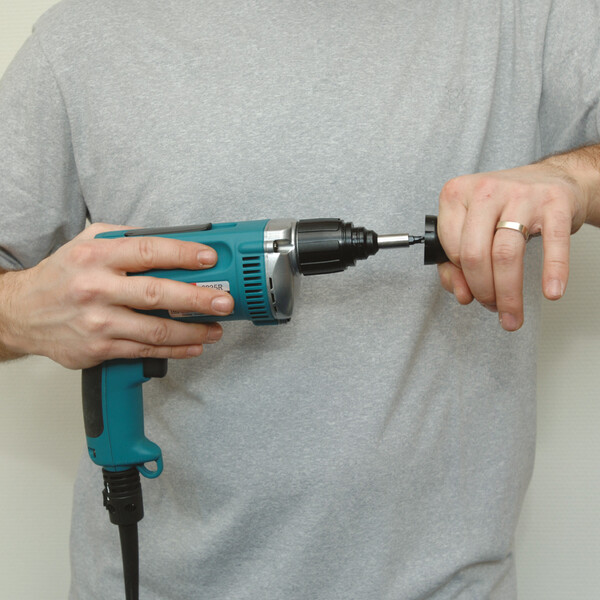
1. Remove the nose cone from the screwdriver according to the manufacturer's instructions (most can be pulled straight off)

2. Remove the bit holder

3. Attach the Quik Drive adapter that fits your screwdriver
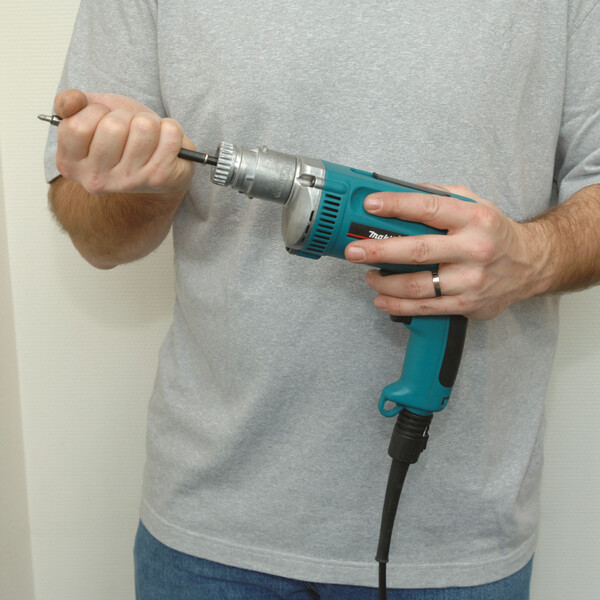
4. Insert the mandrel into the screwdriver or extension.
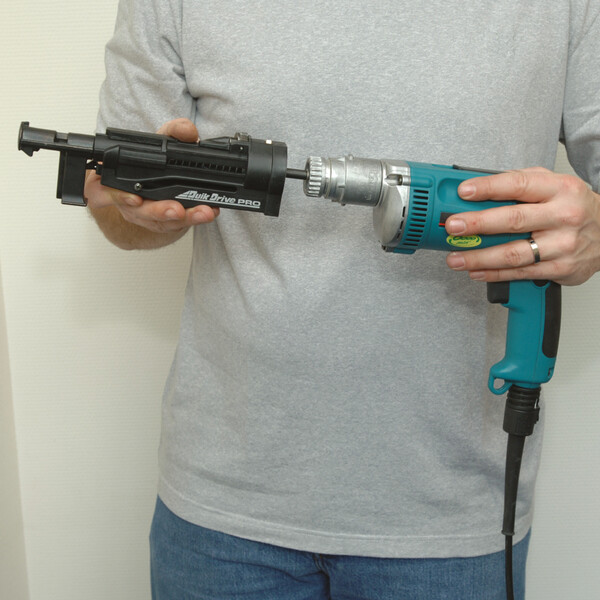
5. Attach the attachment to the mandrel until it is locked by the locking arm

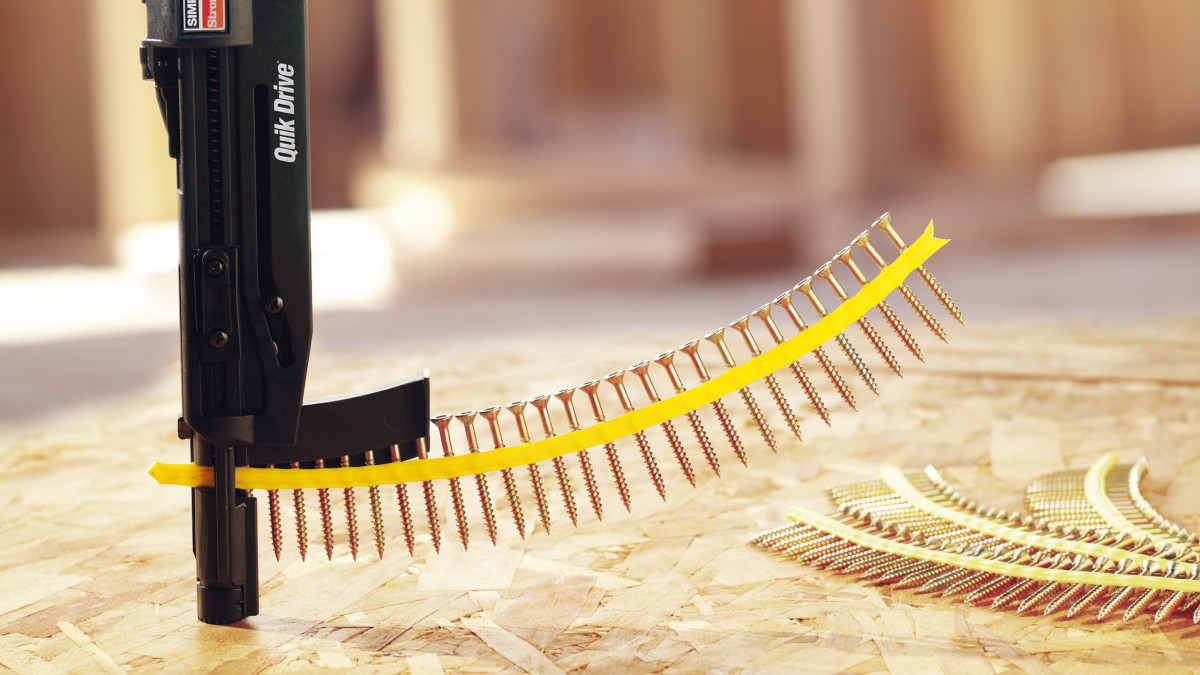
Insert the screw band with the screw tip forward until it clicks into place: Now your Quik Drive screw system is ready for use!
Trouble Shooting
When using the Quik Drive tool
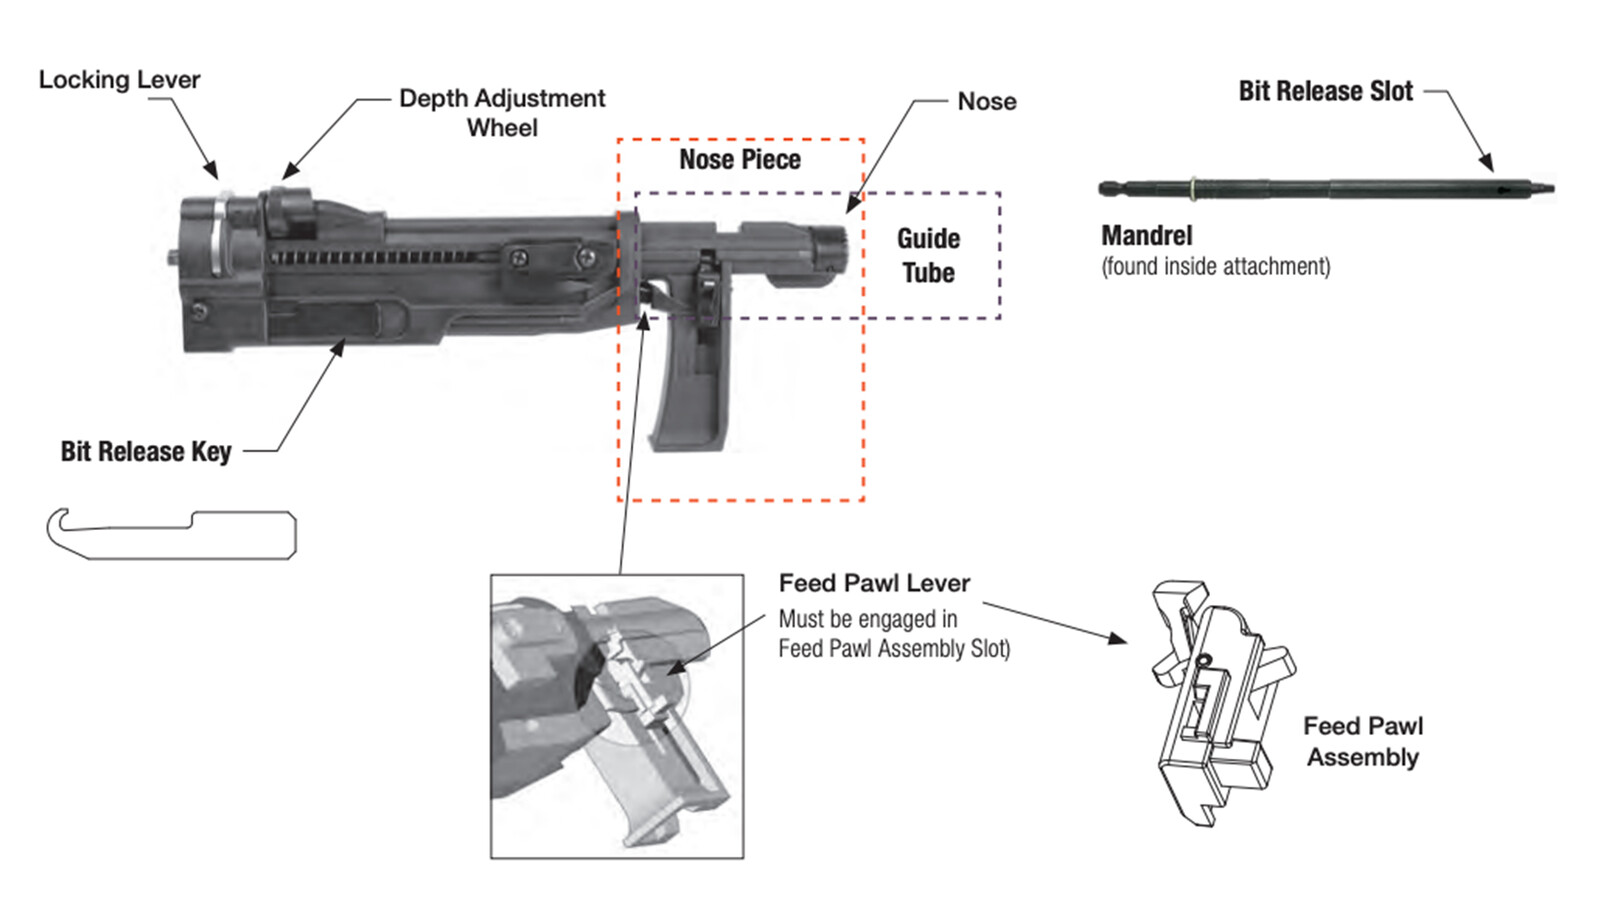
Sympton Solution Screws won't drive. They spin for a second, then lay over on their side.
Make sure the screw gun is not set to reverse. Make sure the screws are being driven straight. Screws won't drive completely. They go down about halfway, then the bit spins out.
Check that you are using the correct bit for the type of screws you are using or if the bit is worn. Replace in either case. Keep constant pressure on when driving the screws. Screws won't drive completely. They are almost completely driven but won't countersink fully.
Check the depth adjustment on the attachment and reset if necessary. You may have missed the substrate. For example in a flooring installation you may have missed the joist. Check that all cir-clips and rings have been removed from the front of the driver before the adapter is fitted. Screws don't advance properly causing the the tool to jam.
Use only Simpson Strong-Tie® Quik Drive® screws. Make sure the screw strip is inserted correctly - pointed end first. Lift the tool completely off the work surface after driving each screw. Don't drag the screw strips on the work surface as you move. Be sure that the feed pawl assembly is intact and the feed lever engaged. Self-drilling screws - issues and solutions
Error Probable Cause Possible Solutions Split at point (web) Excessive force (feed) applied while drilling Reduce application force Outer corners worn or melted Drill RPM (cutting speed) too high Use slower motor or partial trigger pull Cutting edges chipping or breaking Excessive force (feed) applied while drilling Reduce application force Point melted or diameter significantly reduced - Work material too hard
- Insufficient chip clearance
- Excessive force (feed) applied while drilling
- Confirm work material specs
- Choose screw with longer pilot section
- Reduce application force
Screw spins without drilling a hole - Drill motor set on reverse
- Work material too hard
- Drill point blunted by handling
- Check motor direction
- Confirm work material specs
- Inspect unused drill points for possible damage (from handling)
Links
Where to Buy
You can find kits, accessories and of course screws from the following Quik Drive stockists.